Connect Claude Desktop to the Manganese MCP
Claude Desktop reaches your App Servers through the Manganese MCP server, mn25. You add
it once, as a custom connector. The first time a conversation uses it, Claude asks you to
sign in, and you sign in with your Manganese account.
Written on 17 November 2026
This page follows the Claude Desktop interface as it was on that date, and Anthropic changes it from time to time. When a screen no longer matches what you see, contact the Muppy support at the address given in your contract, and we will update this page.
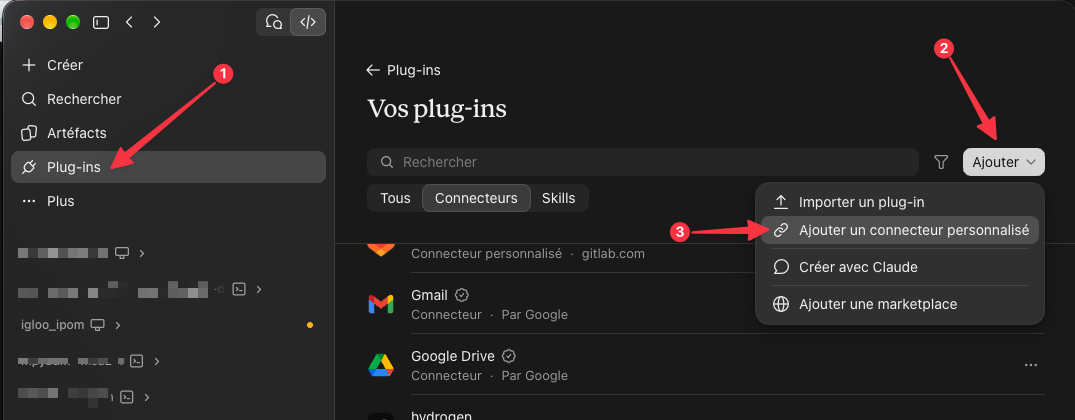
Each screenshot of Claude Desktop comes in English and in French: pick the tab of your interface's language.
1. Copy your MCP URL
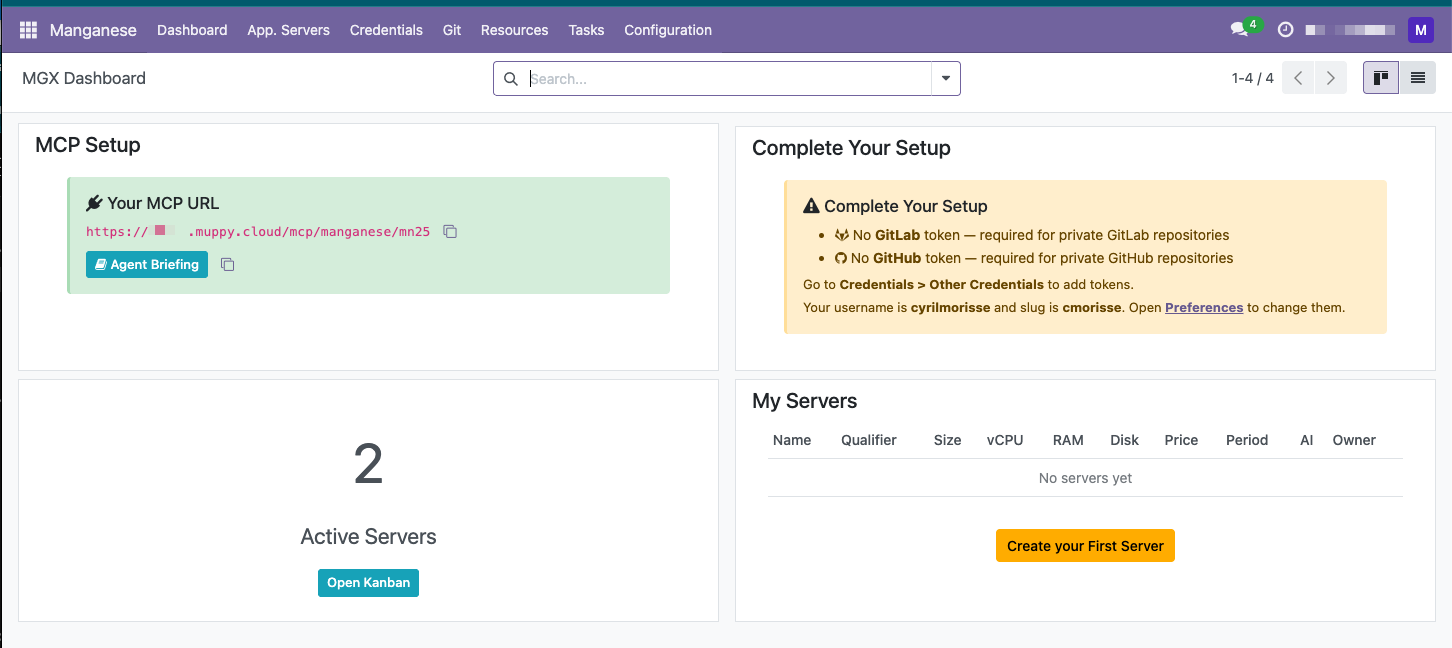
Log in to Manganese and open Dashboard. The MCP Setup tile shows Your MCP URL:
https://<your Muppy>/mcp/manganese/mn25
Copy it with the icon on its right.
2. Add a custom connector
In Claude Desktop:
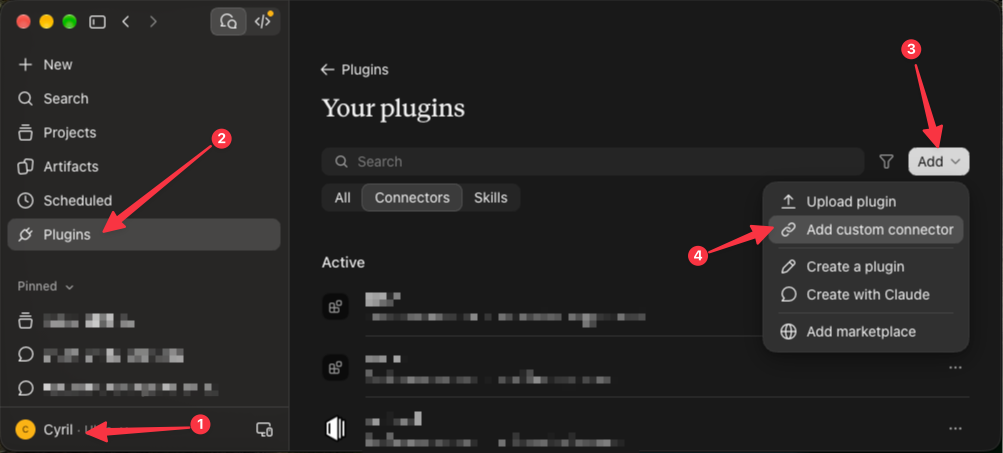
- click your name at the bottom left, to open the menu;
- open Plugins in the sidebar;
- click Add, at the top right;
- choose Add custom connector.
3. Name the connector and paste the URL
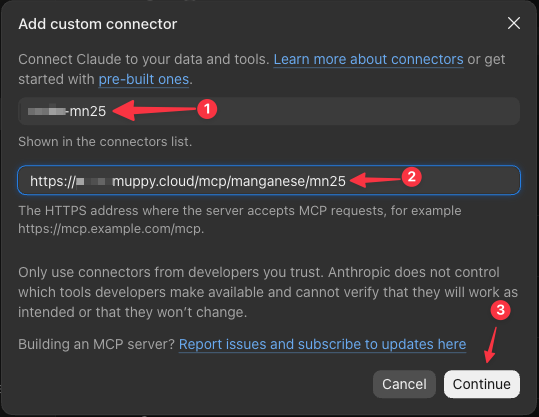
- in the first field, Shown in the connectors list, type a name:
mn25, or<your Muppy>-mn25when you connect to the Manganese of more than one Muppy; - in the second field, paste the MCP URL copied at step 1;
- click Continue.
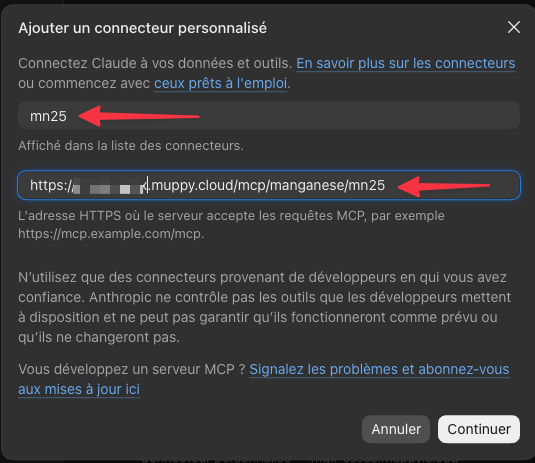
4. Choose how Claude signs in
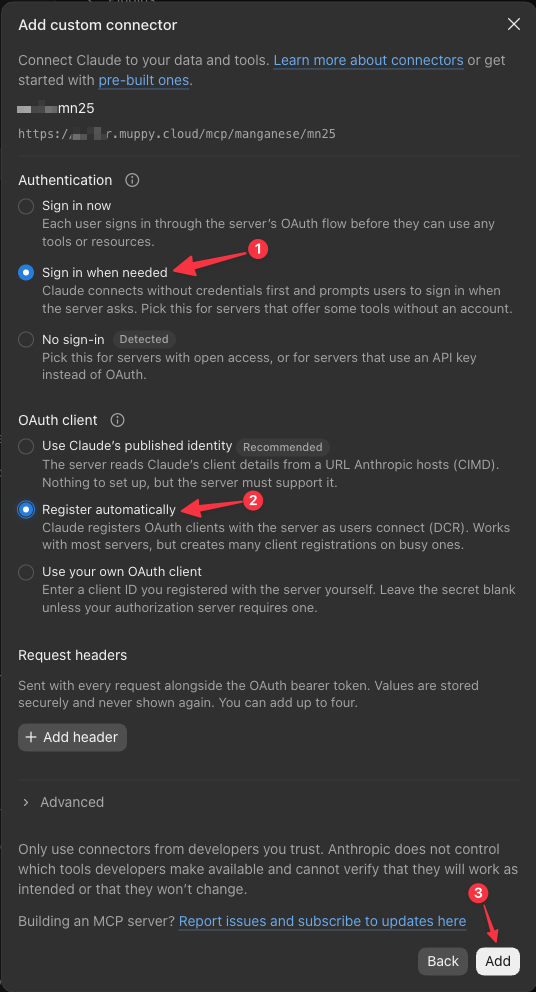
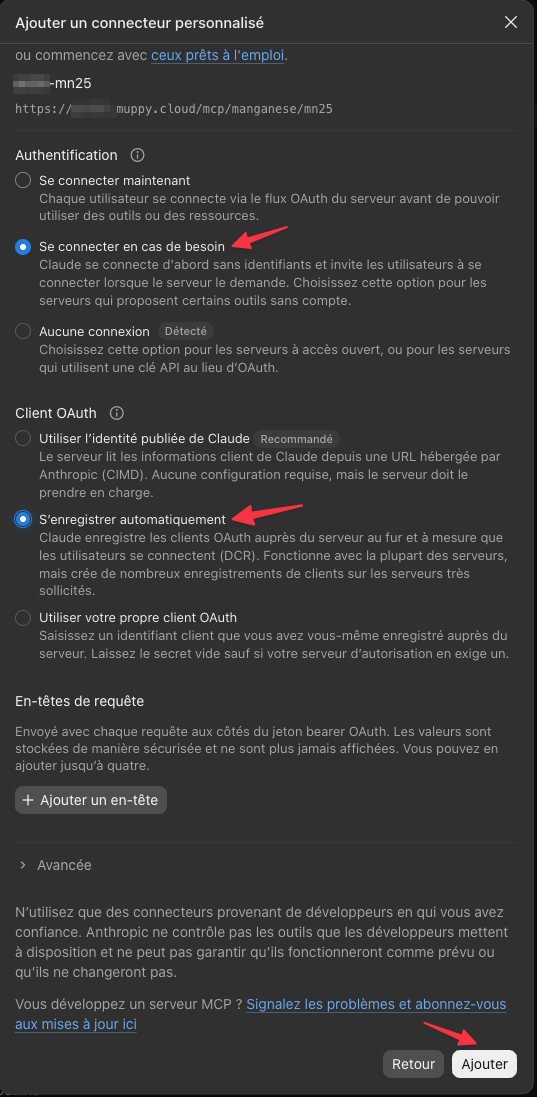
Select two options, then click Add at the bottom of the dialog:
- Authentication: Sign in when needed. The server answers the opening handshake of a client without an account, which is why Claude Desktop marks No sign-in as Detected. Everything after it — listing the tools, calling them — asks for your Manganese account, and with this option Claude asks you to sign in at that moment.
- OAuth client: Register automatically. Muppy registers each client that connects to it (OAuth Dynamic Client Registration); leave aside Use Claude's published identity, the option the screen recommends.
Leave Request headers empty.
5. Sign in with your Manganese account
The first time a conversation uses the connector, Claude asks you to connect, and your browser opens the Muppy login page:
- log in with your Manganese account: your email and your password, then the code of your second factor when your account has one;
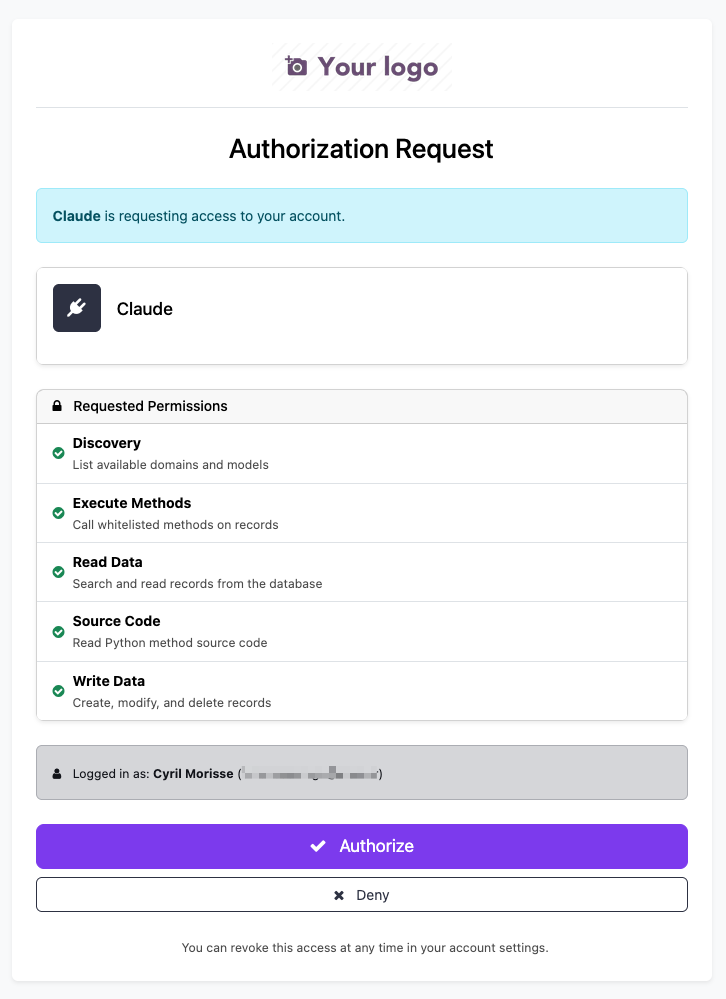
- Muppy shows an Authorization Request: Claude asks for access to your account, with the permissions listed under Requested Permissions — Connecting says what each one unlocks. Check that Logged in as names your Manganese account, then click Authorize;
- Muppy confirms with Authorization Successful. Go back to Claude Desktop.
Claude now acts as you, on what your Manganese account sees.
Next
Before your agent plans an App Server, give it the Agent Briefing.
Related
- Muppy MCP — What an Agent Can Do — the scopes, and the rules every MCP call follows
- Accessing Your App Server — the application, the IDE, SSH