Cloudflare Tunnels
A Cloudflare Tunnel publishes the applications of a host that the Internet cannot reach: a container on a private network, a server behind NAT. A small connector,
cloudflared, runs on the host and opens an outbound connection to Cloudflare. Visitors reach Cloudflare, and Cloudflare sends their requests down that connection.
The connector authenticates with a token. Whoever holds it can run a connector for the tunnel, and so receive its traffic. This page installs the connector so that the token never appears on a command line, in a unit file, or in a process list.
What you need
- A Cloudflare zone that serves your applications' names, and access to its account.
- A host enrolled in Muppy, with Traefik installed — see Traefik Servers.
- A DNS domain in Muppy whose records are proxied: the Cloudflare zone itself, or a Muppy Builtin DNS client whose backend is that zone, with Proxied by Default (via MBD Server) checked.
1. Create the tunnel in Cloudflare
- In the Cloudflare dashboard, open Zero Trust ▸ Networks ▸ Tunnels, and click Create a tunnel. Choose Cloudflared.
- Name it, and save. Create it in the account of your zone: Cloudflare routes a name to a tunnel of its own account only.
- The next page offers install commands. Do not run them: each one puts the token on a
command line, and
cloudflared service install <token>writes it into the unit, wherepsandsystemctl showgive it to every local account. - Copy the Tunnel ID from the tunnel's overview.
Muppy needs an API token to read the tunnel and send it its routes. In My Profile ▸ API Tokens, create a custom token limited to that account, with two permissions:
- Account ▸ Cloudflare Tunnel ▸ Edit, to read the tunnel and push its routes;
- Account ▸ Account Settings ▸ Read, for Muppy to find the account the tunnel belongs to. Without it, Sync from Provider fails with Failed to derive Cloudflare Account ID.
2. Declare the tunnel in Muppy
- Create a Vault of type Cloudflare API Token, and paste the API token in its password.
- Open Network ▸ DNS ▸ Network Tunnels, and create a tunnel:
- Tunnel Type: Cloudflare Tunnel;
- Host: the host where
cloudflaredwill run; - Tunnel ID: the ID copied above;
- Cloudflare API Token: the Vault.
- Click Sync from Provider. Muppy reads the account, the state of the tunnel and its connector token.
-
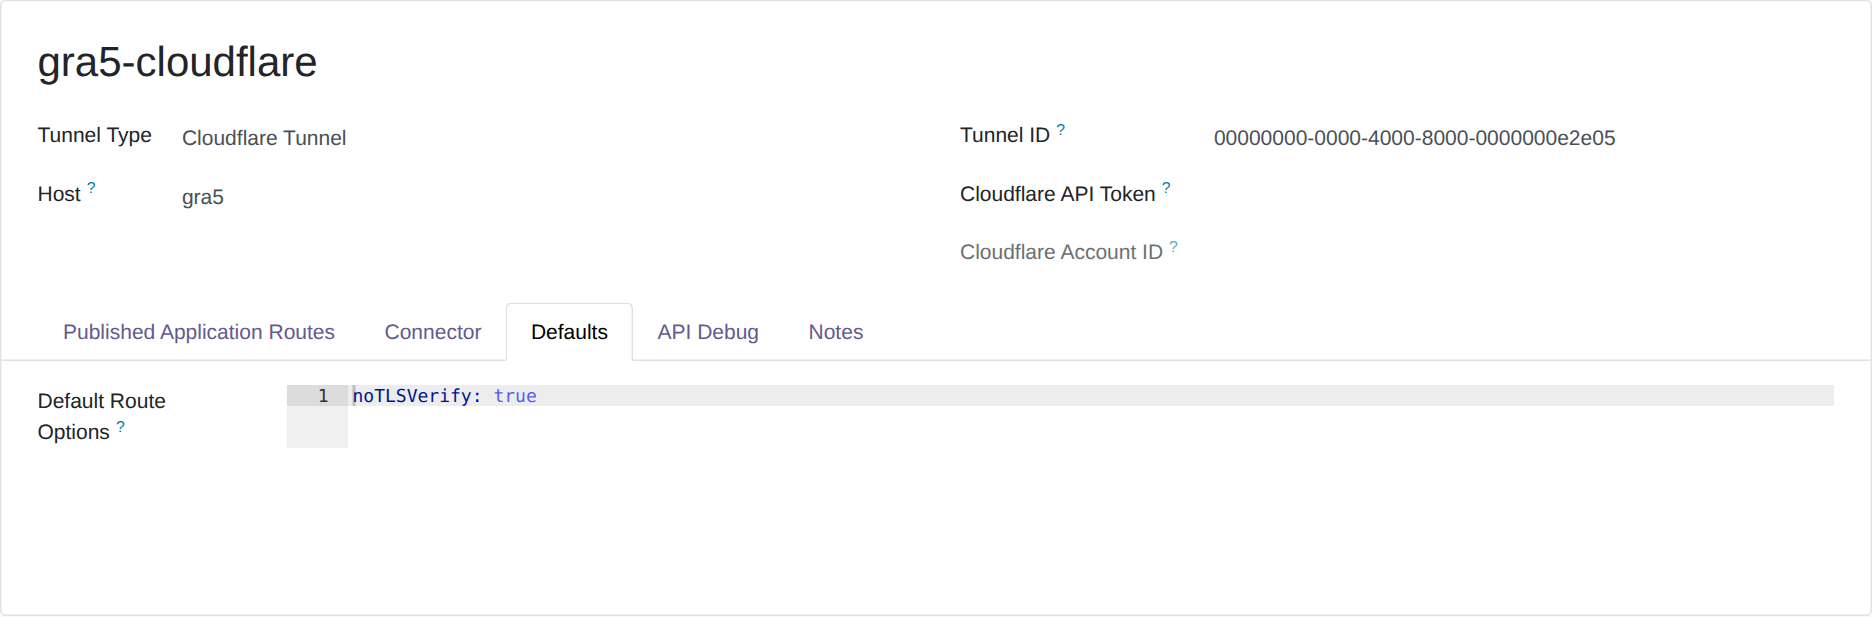
In the Defaults tab, set the route options every new route receives:
noTLSVerify: trueTraefik answers on
https://localhost:443with a certificate issued for the public name, not forlocalhost: the connector must not verify it.
3. Install the connector on the host
Run these commands on the host, as a user with sudo.
Install the package from Cloudflare's repository:
sudo mkdir -p --mode=0755 /usr/share/keyrings
curl -fsSL https://pkg.cloudflare.com/cloudflare-main.gpg \
  | sudo tee /usr/share/keyrings/cloudflare-main.gpg >/dev/null
echo 'deb [signed-by=/usr/share/keyrings/cloudflare-main.gpg] https://pkg.cloudflare.com/cloudflared any main' \
  | sudo tee /etc/apt/sources.list.d/cloudflared.list
sudo apt-get update && sudo apt-get install -y cloudflared
cloudflared --version
Write the token in a file only root reads. Copy the token from the tunnel's Connector tab in Muppy, then:
sudo install -d -m 0700 /etc/cloudflared
read -rs TUNNEL_TOKEN        # paste the token, then Enter: nothing is echoed
printf '%s' "$TUNNEL_TOKEN" | sudo install -m 0600 /dev/stdin /etc/cloudflared/tunnel-token
unset TUNNEL_TOKEN
read and printf are built into the shell: the token never becomes the argument of a
process, so no other account sees it in the process list.
Create the unit, which reads the token from that file:
sudo tee /etc/systemd/system/cloudflared.service >/dev/null <<'EOF'
[Unit]
Description=Cloudflare Tunnel connector
After=network-online.target
Wants=network-online.target

[Service]
ExecStart=/usr/bin/cloudflared --no-autoupdate tunnel run --token-file /etc/cloudflared/tunnel-token
Restart=on-failure
RestartSec=5

[Install]
WantedBy=multi-user.target
EOF
sudo systemctl daemon-reload
sudo systemctl enable --now cloudflared
Check that the token stays out of sight, then that the connector runs:
ps -o args= -C cloudflared                 # the file path, never the token
systemctl show -p ExecStart cloudflared    # the same
systemctl status cloudflared --no-pager
The connector logs one Registered tunnel connection line per connection it opens to
Cloudflare: sudo journalctl -u cloudflared -n 20. In the Cloudflare dashboard, the tunnel
shows Healthy.
4. Serve the host's names through the tunnel
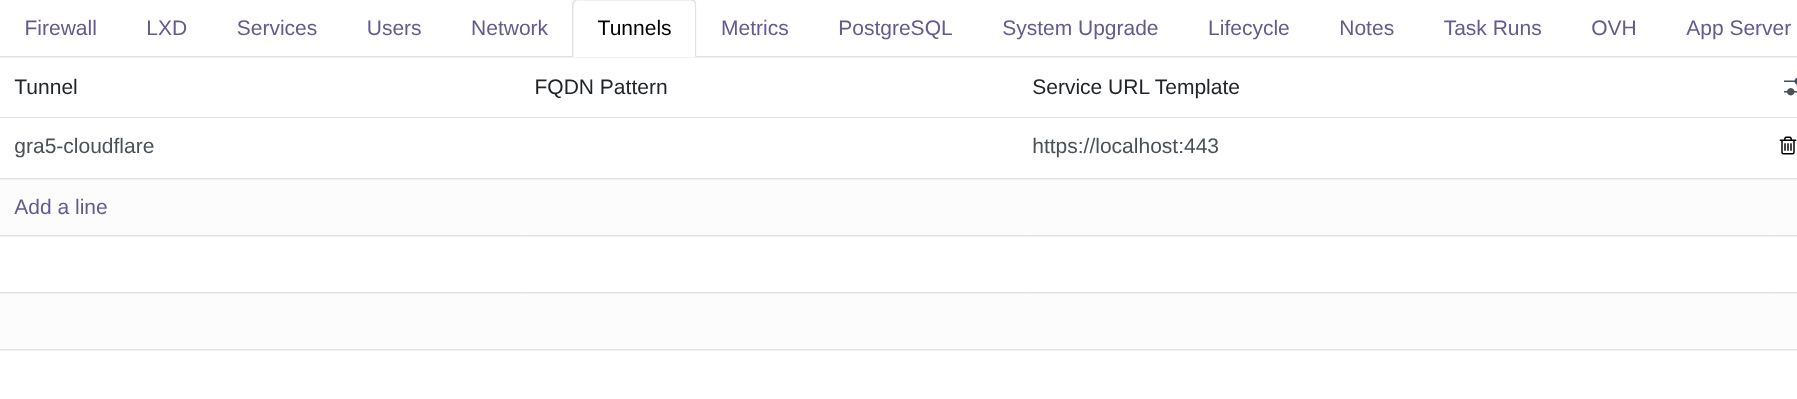
On the host's form in Muppy, open the Tunnels tab and add a line:
- Tunnel: the tunnel;
- FQDN Pattern: empty, so every name of the host goes through it, or a pattern such as
*.example.com; - Service URL Template:
https://localhost:443, Traefik on the host itself, where the connector runs.
Then reconfigure the applications, with (re)Configure 'Traefik Applications' on the App Server. For each name the host serves, Muppy:
- writes a proxied CNAME to the tunnel (
<Tunnel ID>.cfargotunnel.com) instead of an A record; - adds a route to the tunnel, listed in its Published Application Routes;
- gives the route of a Custom Domain to the application that carries one;
- pushes the routes to Cloudflare.
When the token leaked
Rotate it, then give the connector the new one:
- In the Cloudflare dashboard, open the tunnel and refresh its token. The old token stops working, and the running connector stops with it.
- In Muppy, click Sync from Provider on the tunnel: it reads the new token.
- On the host, write the new token in
/etc/cloudflared/tunnel-tokenas in step 3, thensudo systemctl restart cloudflared.